Wednesday, 9 July 2014

Awesome EXPLOSIVE ‘experiment’!


Now, I may have been living under a rock, but until I saw this awesome ‘experiment’ on Studio 10 last week, I did not know that Mentos and diet Coke did THIS when combined!!! 


I just knew my boys would love creating a mini volcanic explosion in their own backyard, so after discovering the phenomenon, I got myself to the shops a.s.a.p. and grabbed three bottles of Diet Coke – because one mini frothy explosion was never going to be enough (and it was on special, my lucky day…) and a three pack of Mentos – because, let’s face it, I would probably eat half of them before I got home (I did).


Donning Jilly Jumbles CRAFT APRONS, que gasps of excitement and wide-eyed amazement from these two mini 'scientists', upon dropping a couple of Mentos into the teeth rotting liquid:


Now, I’m not going to pretend I know why this reaction occurs between the two ingredients in this cool experiment (which I should have probably researched to explain to my boys before we set upon exploding coke), and I am aware we didn’t really conduct an ‘experiment’ at all – the proper way to do it would have been to purchase three different types of soft drink to be the ‘variable’ substance, like Diet Coke, Coke, and Lemonade for example, and use Mentos as the ‘control’ substance, and then see what happened to each different bottle…(which we might do next week)… BUT we did have FUN, and we did witness a very COOL reaction occur between two substances, so I’m going to call it an experiment anyway! 

Next time you're at the shops - grab some diet fizzy drink, and a packet of Mentos -  go on, you know you want to! Have fun!! :-)


Sunday, 8 June 2014

Sydney Childrens Hospital Randwick GOLD TELETHON


Open letter to all of the extraordinary nurses, doctors, and many staff who work tirelessly at the Sydney Childrens Hospital, in Randwick.

Heartfelt thanks from we, the parents of one of your recent patients, Audrey, who spent four nights in the Intensive Care Unit in your hospital less than two weeks ago. Our three week old daughter was transferred from our local hospital, to the ICU at Sydney Childrens Hospital in the early hours of Thursday morning 29th May, with severe bronchiolitis. 


What was a very overwhelming experience for my husband and I, was made endurable with the sensitivity and reassurance from the NETS ambulance staff, of whom we owe a huge dept of gratitude, and the amazing doctors and nurses who received Audrey at the ICU. Particular thanks to the nurses who looked after our baby on her first day there – Carly, and then Kate - as it was their upbeat nature, sensitivity, and competence that gave us the strength and confidence we needed to be there for our little girl. Truly amazing women.


And to all of the doctors who treated Audrey, and the nurses who cared for her, thank you so very much! The support we received from the amazing staff in the ICU was second to none, and the beautiful nature of the nurses while caring for Audrey, we’ll never forget. Julia, Clare, Katherine, and another Clare, and all the nurses names we cannot recall due to exhaustion, thank you. We were kept informed of Audrey's progress at all times, constantly and patiently reassured, and always felt that she was in the best of care. To all other staff, including Dolly the social worker who organised a hostel room for me on the last two nights, so that I could nap between expressing milk for my baby, instead of continuing to sleep in the recliner chair in the ICU, thank you.


Our four days spent in the Intensive Care Unit with our tiny baby, was an experience difficult to describe - it was emotional, overwhelming and eye opening. Being exposed to so many beautiful children who are so unwell, and seeing so many families facing illnesses gripping their loved ones much worse than that which our little Audrey faced, really put things into perspective. 

 
How blessed we are to have our little girl back home now, healthy, happy, and smothered with love as before. It cannot be taken for granted. To the families with little ones still facing tough roads ahead at hospital, we hope and pray for the happiest of outcomes, and we walk away with a renewed and enormous respect for the dedicated doctors, nurses, and all the staff who make the Sydney Childrens Hospital such an extraordinary place to be cared for. 


Those who deserve thanks the most, often hear it the least, so from my family to the Sydney Childrens Hospital, thank you!!

Audrey's mum and dad, Julia and Daniel, 
and her big brothers, Henry and Anthony 

Please donate now to the Gold Telethon

---------------------

I want to also make mention that we spent several nights either side of those in ICU at Randwick at our local hospital also - St George Hospital in Kogarah - and the staff there were wonderful too. They deserve our tremendous thanks. We are also extremely blessed with so much family support – just knowing our two young sons were looked each day meant we could focus on our baby while she needed us to. Thank you so much mum and dad, and all my siblings! And to my friends who kept my feet on the ground, and a smile on my face during the whole experience, what would I have done without you! So very blessed.
J xx

Tuesday, 18 February 2014

MAGIC PLAYDOUGH

Magic Playdough
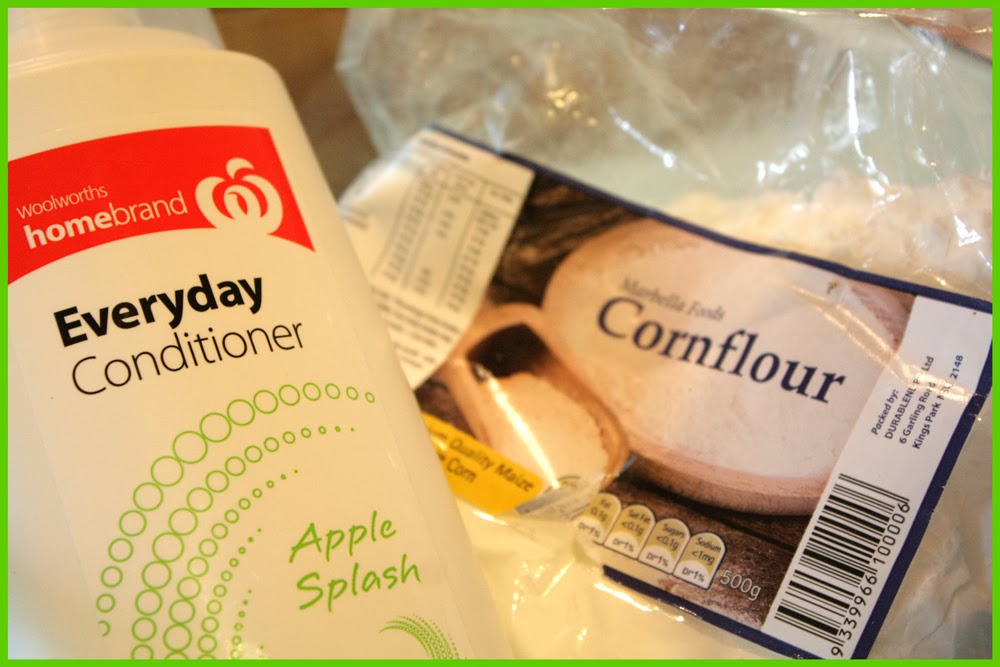
A few weeks ago, a good friend (and fellow mum) had my littlest son and I round for a playdate and coffee. As we chatted while our boys played (aka, got up to mischief - no idea what room of the house they were in at the time, but they were occupied - and that was good enough for both of us), we found ourselves moulding and squeezing and absent mindedly playing with THIS stuff - which my friend had whipped up with her three (now four) kids that day! She's a pretty awesome mum!

I have been looking forward to making it at home ever since - SO simple, cheap, and such a fabulous textural activity for little ones! 

My four year has branded our batch 'magic playdough', and I think we'll stick with that name - because it involves just TWO INGREDIENTS! Well, three, if you fancy colour...


Ingredients:
1 Part Conditioner
2 Parts Cornflour
Food colouring (optional)
THAT'S IT!


Method 
1) Aprons ON! Remember Jilly Jumbles can help you out with this step!
2) Mix all ingredients in a big bowl until smooth and not sticky! Hands are best for this I think - messy fun!!


Note: you may need to adjust the measure of cornflour or conditioner, as conditioner brands can vary in consistency.


3) PLAY!!! (Did I mention it smells divine, and my hands are so delightfully smooth now!)


My four year old has been playing happily and creatively with his 'magic playdough' for over half an hour now, while I've sat here next to him on my laptop, adding this little blog! It's such a joy to have him share his imagination with me, using the 'magic playdough' to tell stories and create sculptures, while I tap away to you all!


 Let me know if you get a chance to whip up this easy recipe for fun too, and share your pictures on my Jilly Jumbles Facebook page any time! Especially if your little ones dons a JJ craft apron!

~Julia
 

Wednesday, 2 October 2013

Sponge Painting

Any craft that involves household items to create is a winner if you ask me! Chances are you will have all the items you need in the cupboard, the activity is going to be nice and cheap, and the kids are going to learn to be resourceful and imaginative with everyday items! Winners all round!

Enter stage left - sponge painting! 

I found this little gem found in 'Childrens Art & Crafts' by The Australian Women's Weekly' - a publication that was printed when I was a kid, and used by my own mum as a reference point for creating with my siblings and I! I remember pouring over it's pages with glee as a child, my head buzzing with ideas, and fingers itching to create!


All you need for this little activity is:
A craft apron to protect your little ones clothes - Jilly Jumbles can provide these!
Thick household sponges cut into shapes (you can also glue two thin sponges together).
Clothes pegs to act as handles for stamps - simply cut two slits at the top of each sponge to clip into.
Plates / bowls for coloured paint, and paper for stamping!


'A print is making an impression of an object onto paper or another surface. Printing encourages an appreciation of texture and the development of a design through the repetition of an impression... Because small muscle co-ordination is not necessary to quickly achieve attractive reproductions of objects, young children experience a sense of great accomplishment.'
Extract from 'Childrens Art & Crafts' by The Australian Women's Weekly'


We used paper plates as our medium for stamping, I find the thick cardboard great for handling paint, and easy for little hands to hold still while stamping. The paint impression from the sponges created a very interesting textural effect, and my boys loved experimenting with overlapping stamp impressions, dragging the stamps across the paper, and mixing colours! A fantastic activity, which we highly recommend you try at your place! (Oh, and you could of course wash and keep the sponges for next time - but I have to admit to being relieved at simply chucking these ones out...)


Wednesday, 25 September 2013

Paper Plate ALIEN SPACE SHIP

We LOVE paper plates around here! 

They are fantastic for eating off of course - to save on washing up at big gatherings - BUT even more fantastic for craft! They're so versatile! This craft is adapted from a fantastic idea we saw on 'Mr Maker' last week, to use paper plates as the base for our 'space ship' instead of the containers he used!

We went straight to our 'doodle drawers' to collect the bits and pieces we'd need for this activity - though our 'doodle drawers' actually look more like a fabulous Ikea trolley, filled to bursting with everything we'll ever need for a rainy day - or a sunny one at that!


We wore:
Jilly Jumbes 'Colour Me Apron' 

We used:
2 X paper plates.
1 X fluffy ball thingy.
1 X clear plastic container (who's previous life was nuts...)
3 X craft googly eyes (the 3 is vital here, if you ask my assistant).
Sparkly pipe cleaners, round colourful things, and textas to decorate.
Stapler/craft clue.
A piece of string to hang your spaceship at the end.


We turned one paper plate upside down and decorated it (this was the top piece of our spaceship). Stuck the fluffy ball thingy in the center and popped on 3 eyes - that's your alien!!

Then we decorated the upside down clear plastic container, and glued it over the top of our alien (best to tie your string on for hanging before you glue this down...), and stapled our second paper plate to the underside of the first! 

So simple, and I let my three year old guide all the decorating through the whole process! We hung our spaceship to a tree and had a lot of fun playing!


'Making things is a way of expressing one's unique self, part of the process of becoming a strong and whole individual. A pasted egg-carton or an indecipherable scribble is an individual's own miraculous creation. The adult's job is to provide suitable materials, encourage the process, value the result and clear up the mess.'

The New Useful Book - Songs and Ideas from ABC Play School


Monday, 23 September 2013

Spray Bottle Painting

This probably isn't new to you, but it is to me! Suggested by one of my fabulous Jilly Jumbles customers, we gave spray bottle painting a whirl at our place this spring! 


I picked up four cheap spray bottles from Woolies - less than $2 each - filled each with a different coloured squirt of paint diluted with a little water. Then tapped long rolls of paper to our fence OUTSIDE (we love the paper roll from Ikea - it's nice a thick), and whacked on our Jilly Jumbles craft aprons!

Bobs your Uncle, Fanny's your aunt (not that I've ever understood that saying) - we were ready to create! My three and five year old boys LOVED experimenting with this craft!! And all I had to do was hose the fence down afterwards, happy days!


'Painting is primarily a blend of colour, texture and design. Young children are almost overwhelmed with the sensation of colour blending with colour and are amazed at their own power to create beautiful images, unusual designs and new textures...
'Paint is thick, drippy, transparent, opaque, airy or glossy. The wonderful qualities of paint combine to lead a child on a new sensory adventure. Encourage the young artist to experiment rather than copy our examples exactly. Mix paints and textures, let different techniques be combined for delightful new effects.'

 
Extract from
'CHILDRENS ART AND CRAFTS' The Australian Women's Weekly 
  (One of my favourite 'go to' books for crafty ideas!)


We even came back to our artwork the following day to create a very special banner!! (We forgot to put on our aprons that day...that was a mistake...but we live and learn people...we live and learn...)